


What is a splash screen?
At the very beginning, when we open any application and see the first graphical screen we receive, it is called a splash screen. Normally, every app has a logo, if we don't modify this default icon or any custom screen that is developed by the developer will appear for a few moments and disappear.

Note: Above image, see left image, app name AlertBook, when I have opened it, this mobile-type icon will remain for 2 to 3 seconds and then it will open the main activity. The middle one is an example of a splash screen.
Things are required to Develop a splash screen:
ViewModel in android:
ViewModel class help to store and manage view-related or UI-related data. Though configuration changes (such as screen rotation, keyboard opening, and closing, changing the device's language, etc... ), this class is designed to survive and hold data.
SplashScreen API:
SplashScreen API is introduced by Android 12. Android 11 or before, we had to create a separate custom activity to show a splash screen. It is more powerful, with this we don't need to create any activity to show the splash screen. We can also add animation with the help of this API.
If you have already created separate activity to display the splash screen in Android 11 or lower, you need to migrate the app to SplashScreen API to confirm that it is displaying in Android 12 and higher in the correct way.
Follow the Steps to Implement the Project:
Step 1:
Create a new project with Empty Compose Activity.

Step 2:
Give name of the project and choose the language Kotlin.

Step 3:
Add dependency in build.gradle(Module: APP_NAME.app) file under Gradle Scripts and click on 'Sync Now'.
implementation 'androidx.core:core-splashscreen:1.0.0-beta02'

Also, refer to this doc -> SplashScreen API to add dependency.
Step 4:
Create customize XML:
I have created a vector asset (name: phone_logo.xml) in the drawable folder, you can create it as you want.

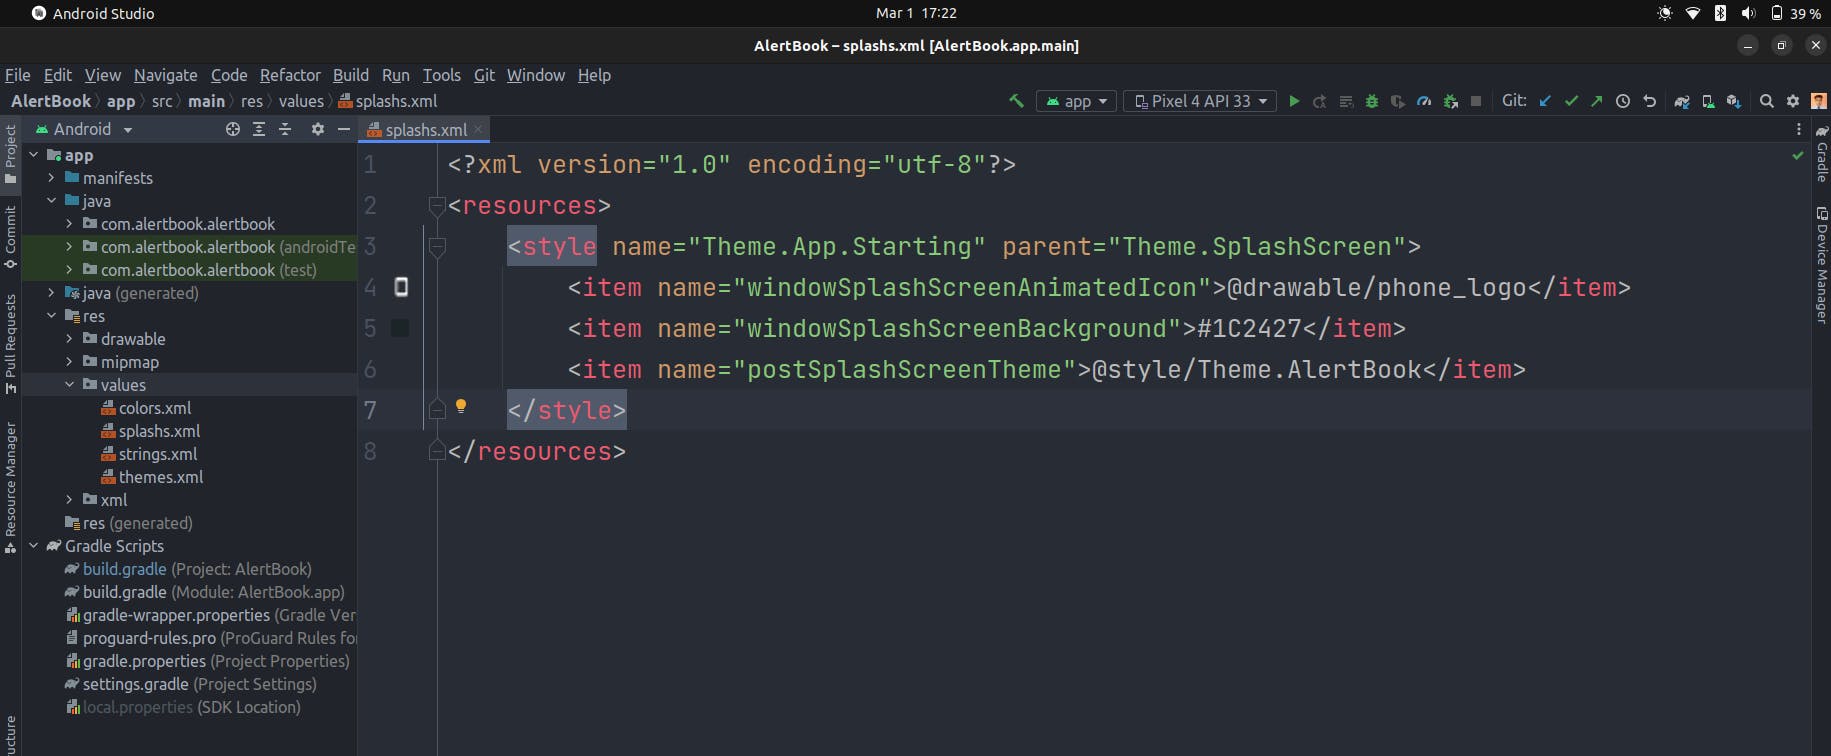
create a value resource file (here name: splashs.xml ) in the values directory and customize your style as you wish.
Set Splash Screen Theme:
We will customize the splash screen for our app by specifying a few attributes:
Animated Icon:
Using windowSplashScreenAnimatedIcon, we'll replace the icon in the center of the starting window.<item name="windowSplashScreenAnimatedIcon">@drawable/phone_logo</item>Background Color:
we'll specify a single color in the color.xml file and set the color using windowSplashScreenBackground.
<item name="windowSplashScreenBackground">#1C2427</item>Post Theme:
postSplashScreenTheme helps your app to set the application's actual theme ( by default ) after the splash screen has finished showing.<item name="postSplashScreenTheme">@style/Theme.AlertBook</item>
Step 5:
Change the theme also in the manifest file.
As we create our starting theme with the name "Starting" (see above splashs.xml ), for this we have to manually set the theme in the manifest file.
android:theme="@style/Theme.App.Starting"
Note: Don't forget to include styles that we created in splashs.xml.

See line no. 12 and 18 in the above image where I have added the theme.
Step 6:
create SplashViewModel.kt:
package com.alertbook.alertbook.models

import androidx.lifecycle.ViewModel
import androidx.lifecycle.viewModelScope
import kotlinx.coroutines.delay
import kotlinx.coroutines.flow.MutableStateFlow
import kotlinx.coroutines.flow.asStateFlow
import kotlinx.coroutines.launch

class SplashViewModel: ViewModel() {

    private val mutableStateFlow = MutableStateFlow(true)
    val isLoading = mutableStateFlow.asStateFlow()

    init {
        viewModelScope.launch {
            delay(2000)
            mutableStateFlow.value = false
        }
    }
}

Step 7:
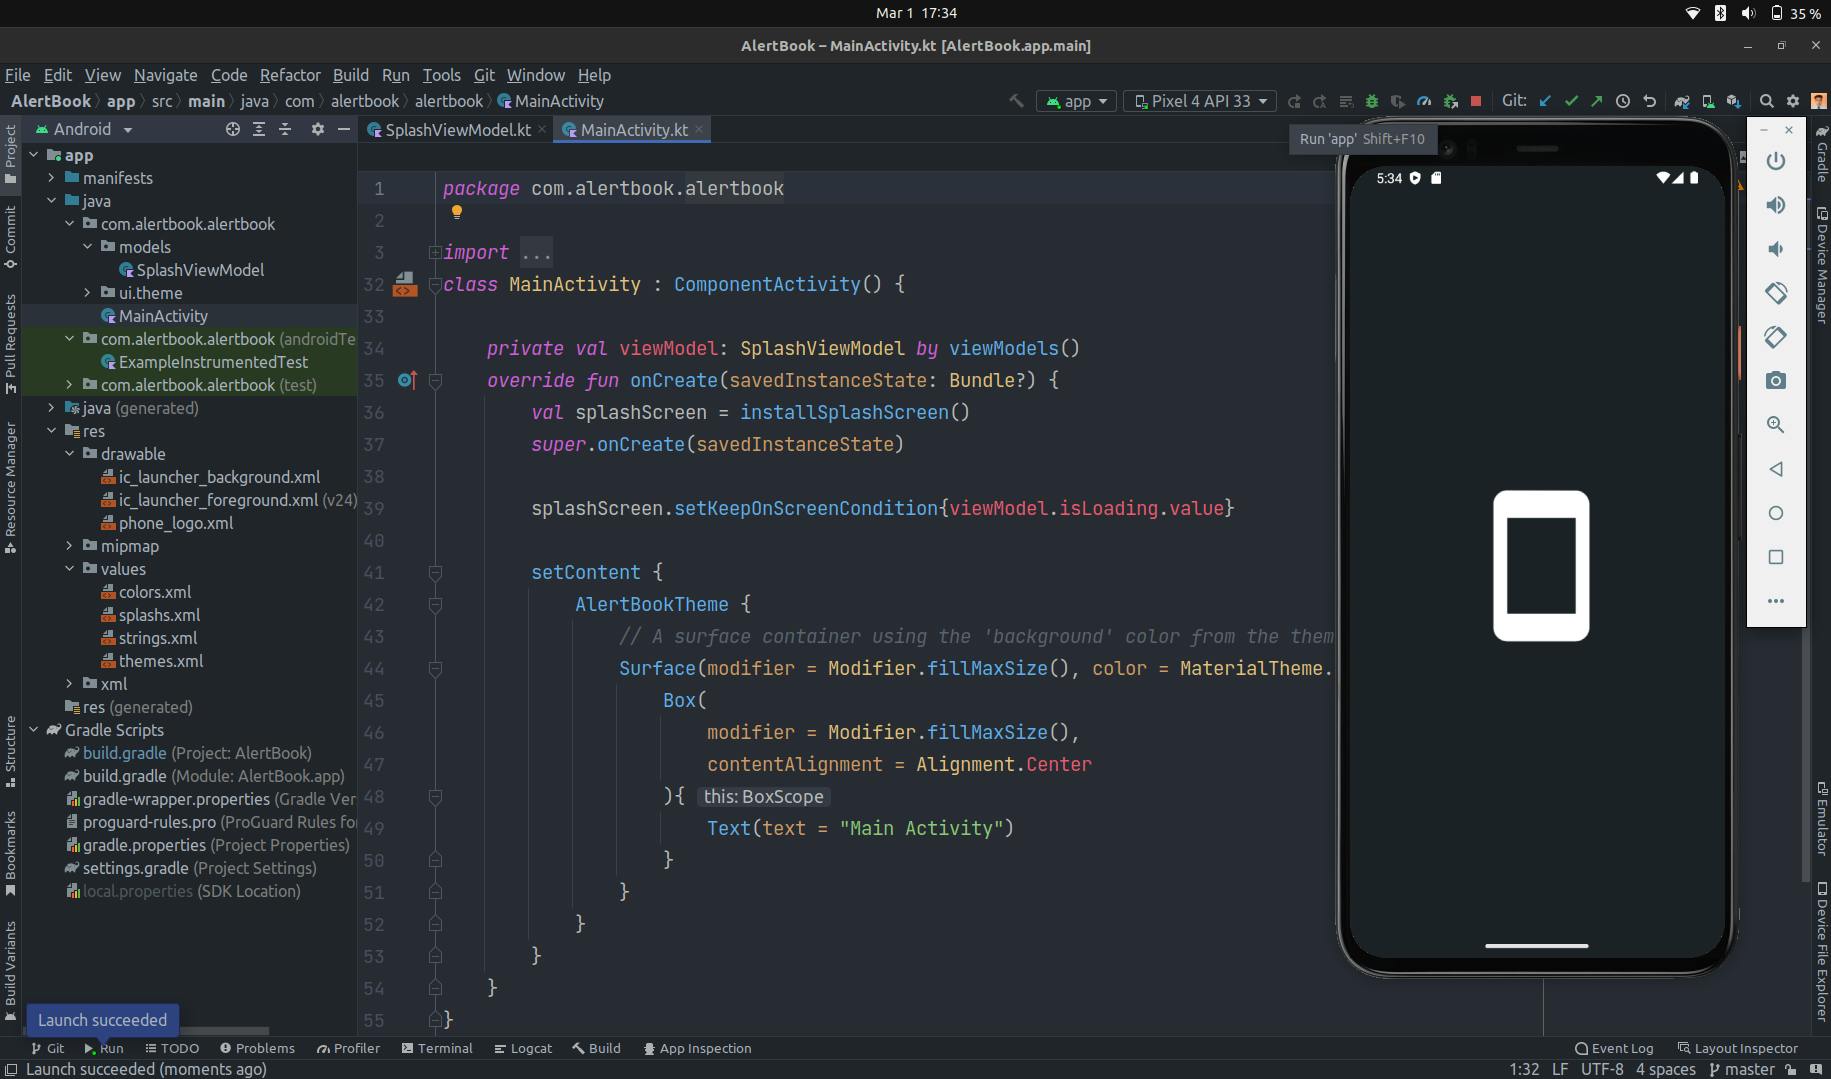
Implement splash screen in MainActivity:
package com.alertbook.alertbook

import android.os.Bundle
import androidx.activity.ComponentActivity
import androidx.activity.compose.setContent
import androidx.activity.viewModels
import androidx.compose.foundation.layout.Box
import androidx.compose.foundation.layout.fillMaxSize
import androidx.compose.material.MaterialTheme
import androidx.compose.material.Surface
import androidx.compose.material.Text
import androidx.compose.ui.Alignment
import androidx.compose.ui.Modifier
import androidx.core.splashscreen.SplashScreen.Companion.installSplashScreen
import com.alertbook.alertbook.models.SplashViewModel
import com.alertbook.alertbook.ui.theme.AlertBookTheme
class MainActivity : ComponentActivity() {

    private val viewModel: SplashViewModel by viewModels()
    override fun onCreate(savedInstanceState: Bundle?) {
        val splashScreen = installSplashScreen()
        super.onCreate(savedInstanceState)

        splashScreen.setKeepOnScreenCondition{viewModel.isLoading.value}

        setContent {
            AlertBookTheme {
                // A surface container using the 'background' color from the theme
                Surface(modifier = Modifier.fillMaxSize(), color = MaterialTheme.colors.background) {
                    Box(
                        modifier = Modifier.fillMaxSize(),
                        contentAlignment = Alignment.Center
                    ){
                        Text(text = "Main Activity")
                    }
                }
            }
        }
    }
}
Finally, we have followed for a long. Now, it is time to run our app.
See the video where app is running :
I hope this blog helps you to build a splash screen from scratch in Jetpack compose. If you find this helpful, share this blog on your social.
Thank you.
Source code: splash screen
Connect with me
LinkedIn - Suraj Maity
Twitter - Suraj Maity